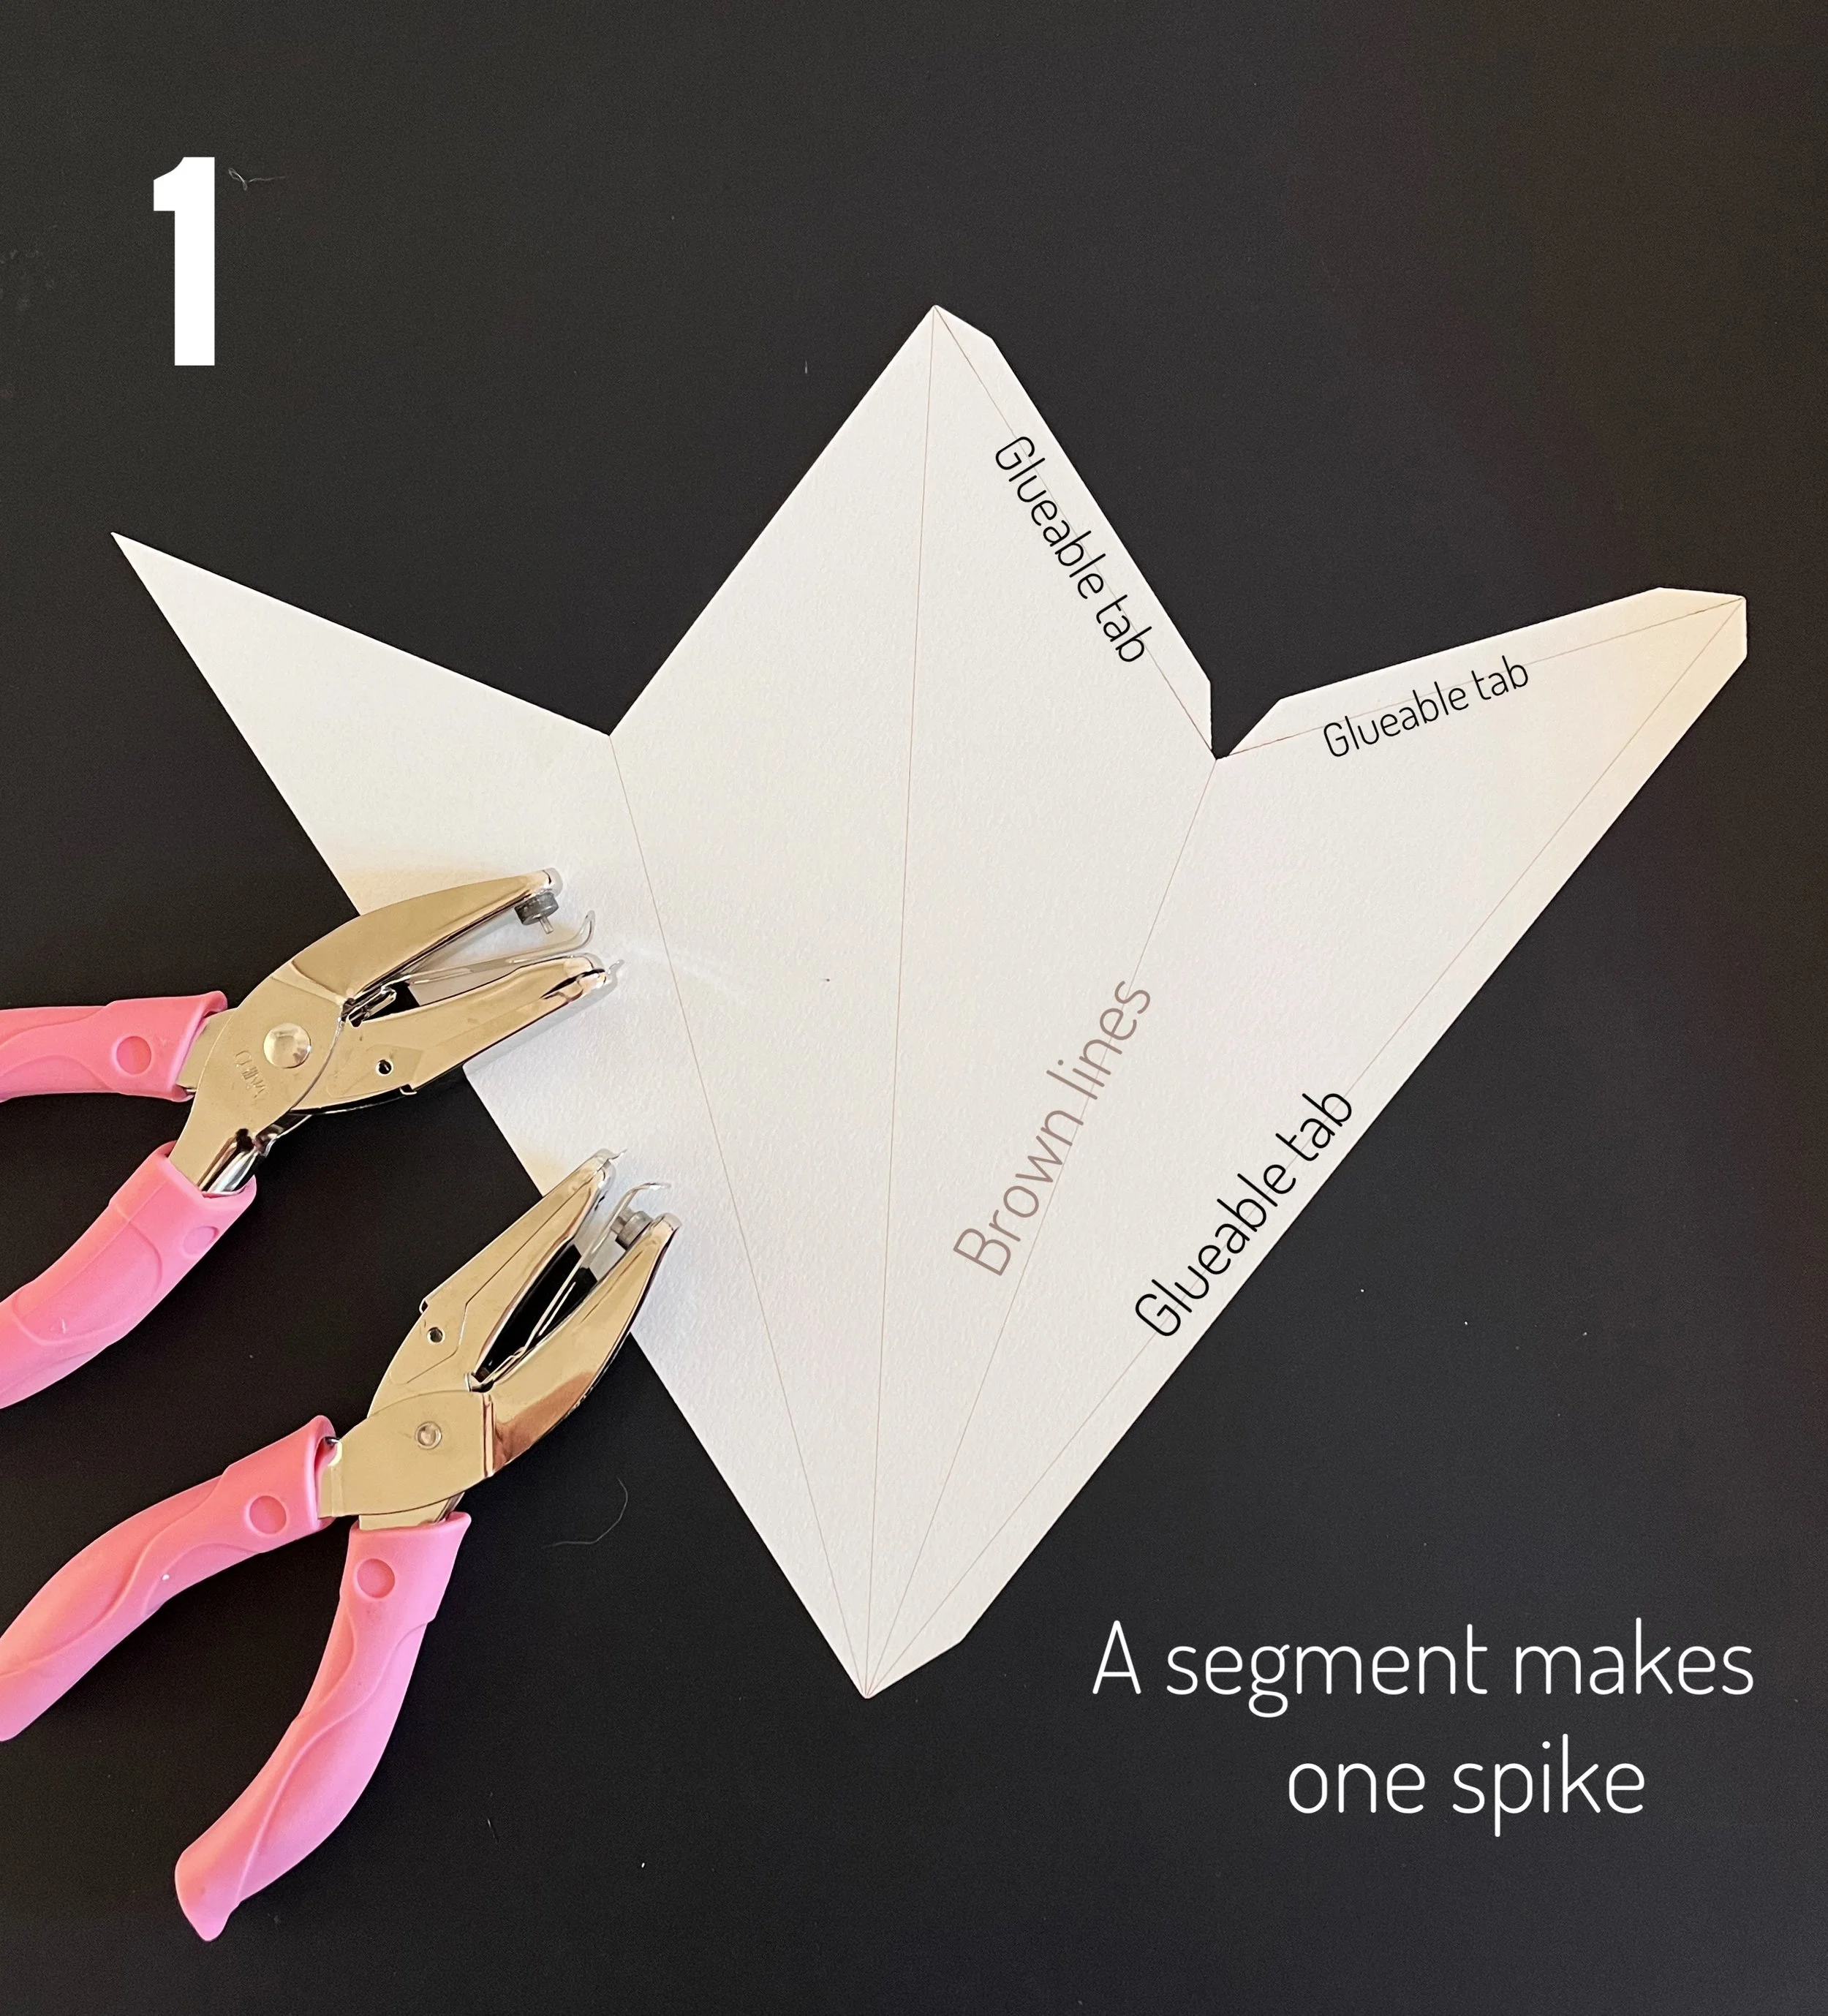
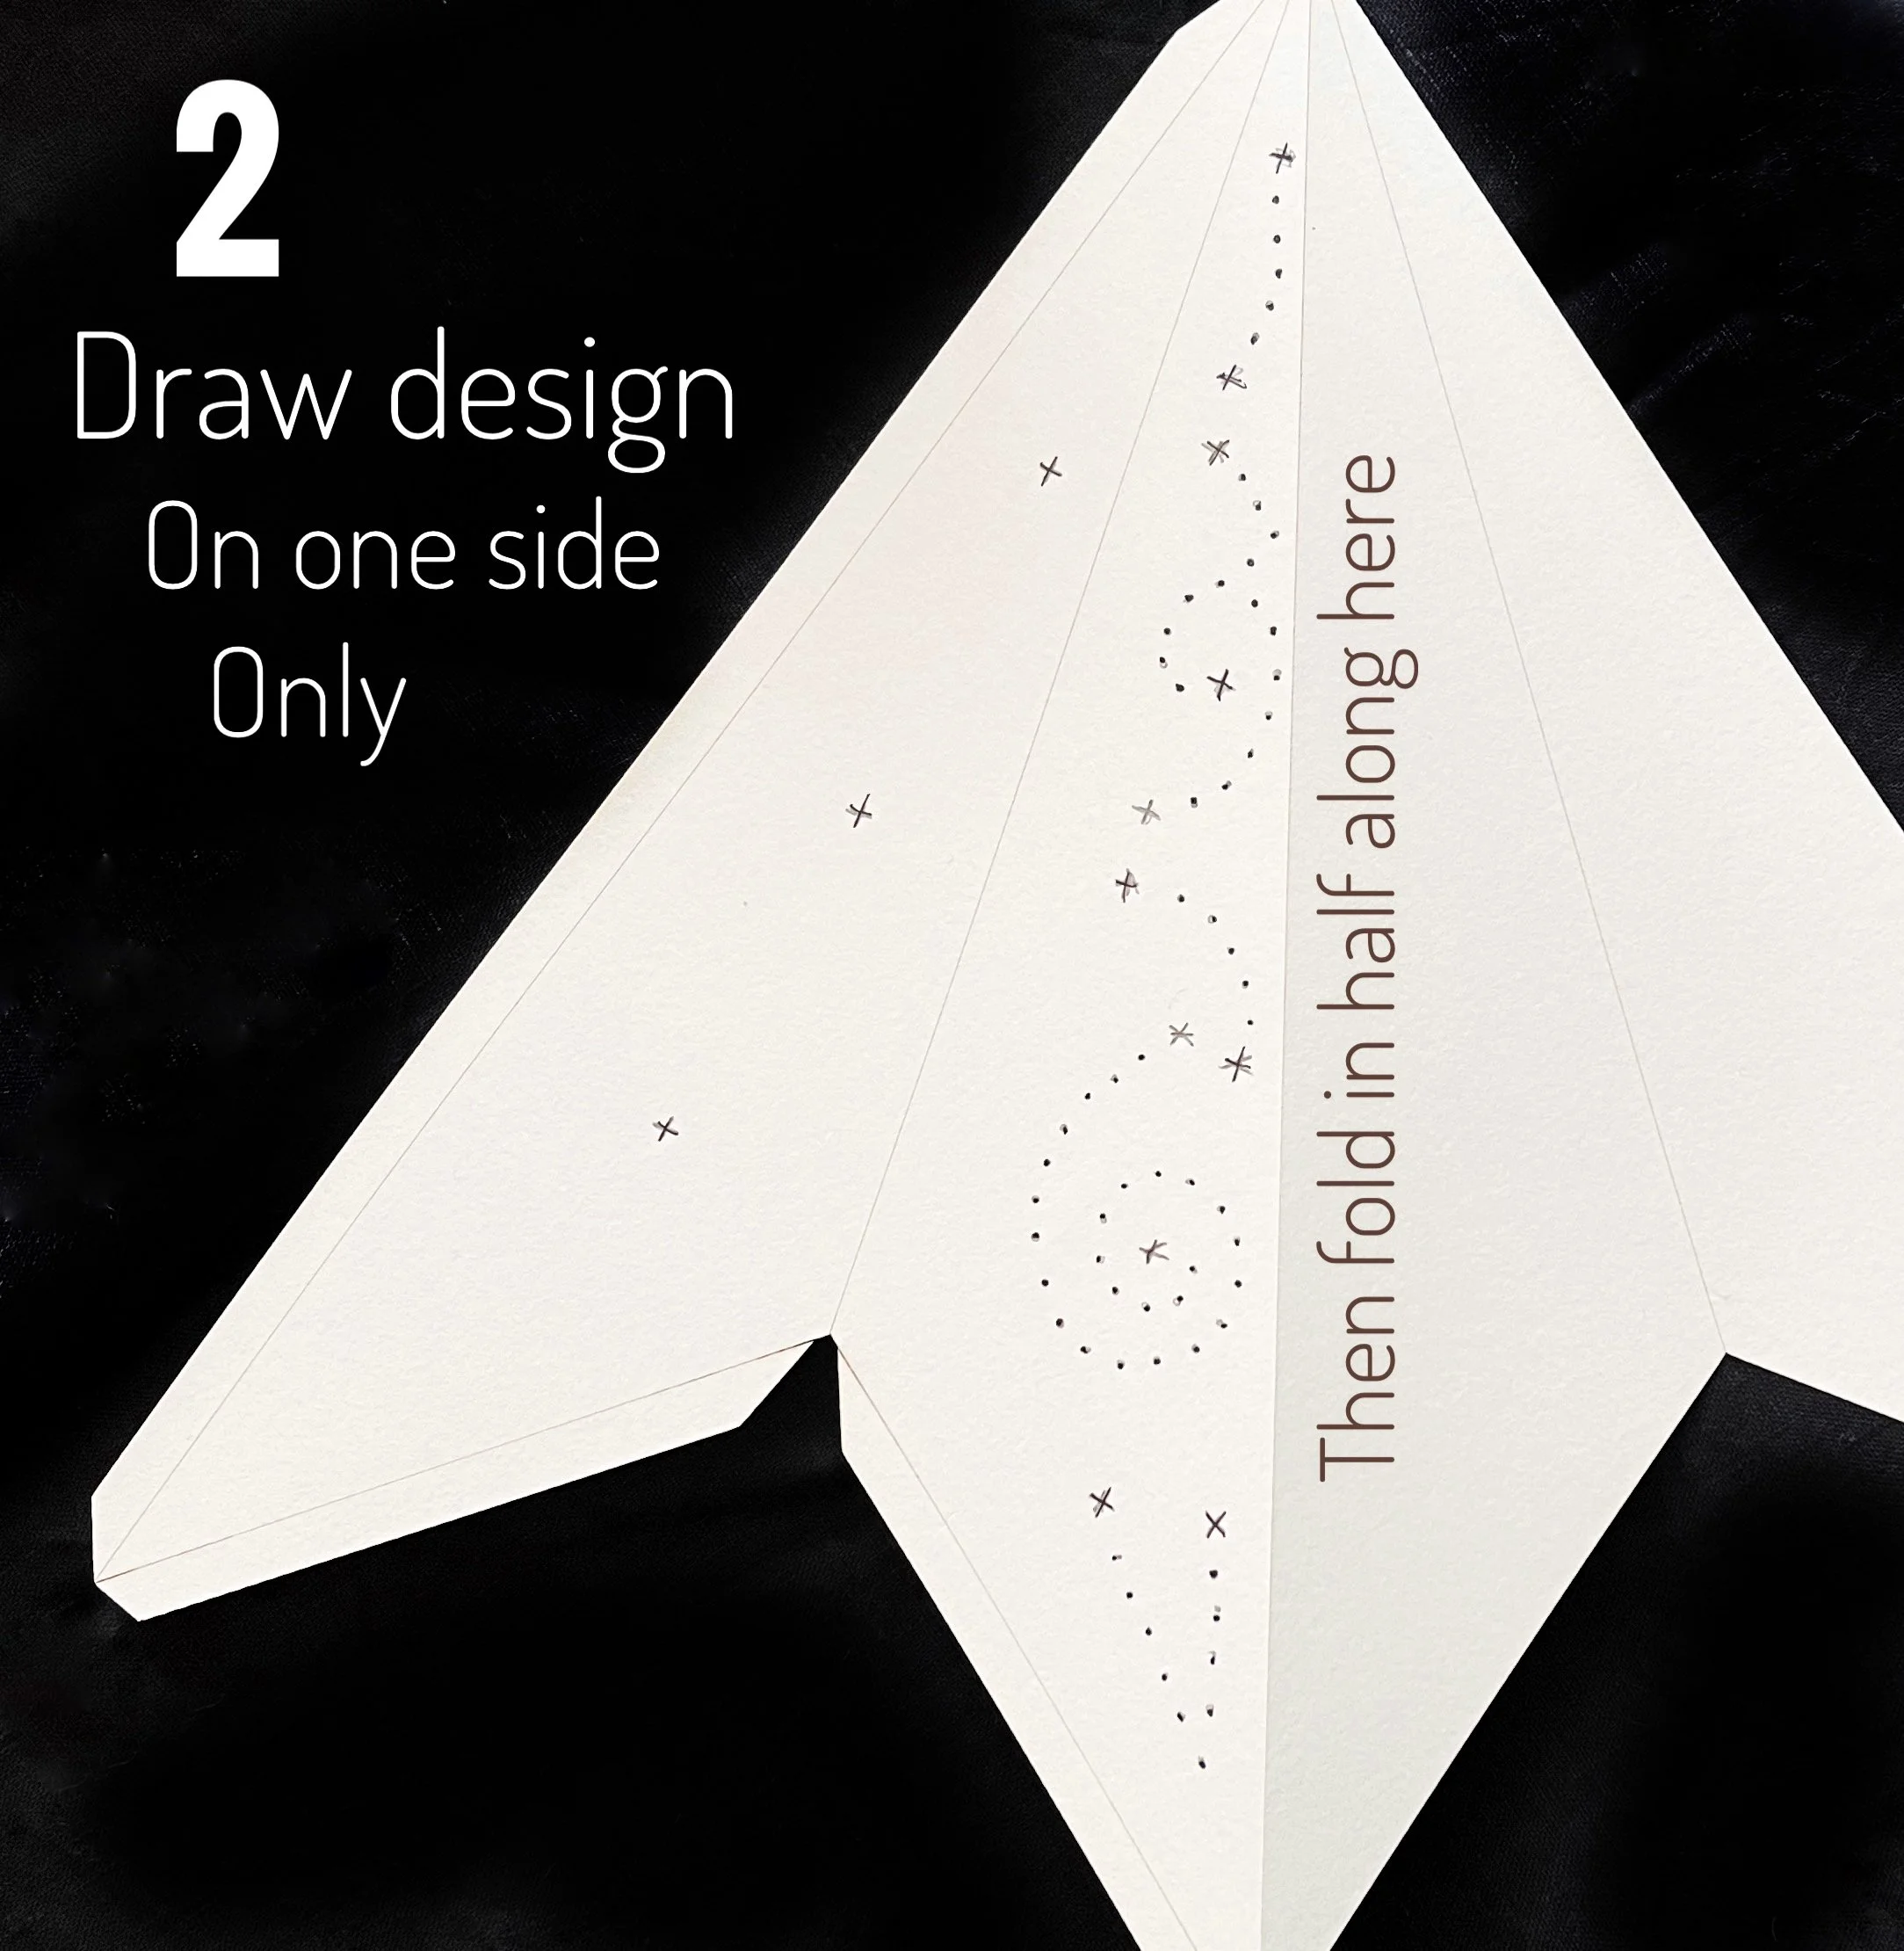

There are seven laser cut paper segments in your kit. Each of these will become one spike of your seven pointed star. Place one of these segments on the table with the brown score lines facing upwards and draw a design for the pattern of holes you’d like to appear on your star. You only need to draw this pattern on half of the segment because you’re going to be folding it in half and punching through both halves at the same time, thus creating a symmetrical pattern.
Your pattern could include curved lines of holes, or straight lines, or both. It could have stars or tiny dots or both, but make sure you only sketch the design in areas that your hole punches can actually reach. (There’s a very small area on your star that can’t be reached with most hole punches). Try out your punching tools first to see where they will reach.
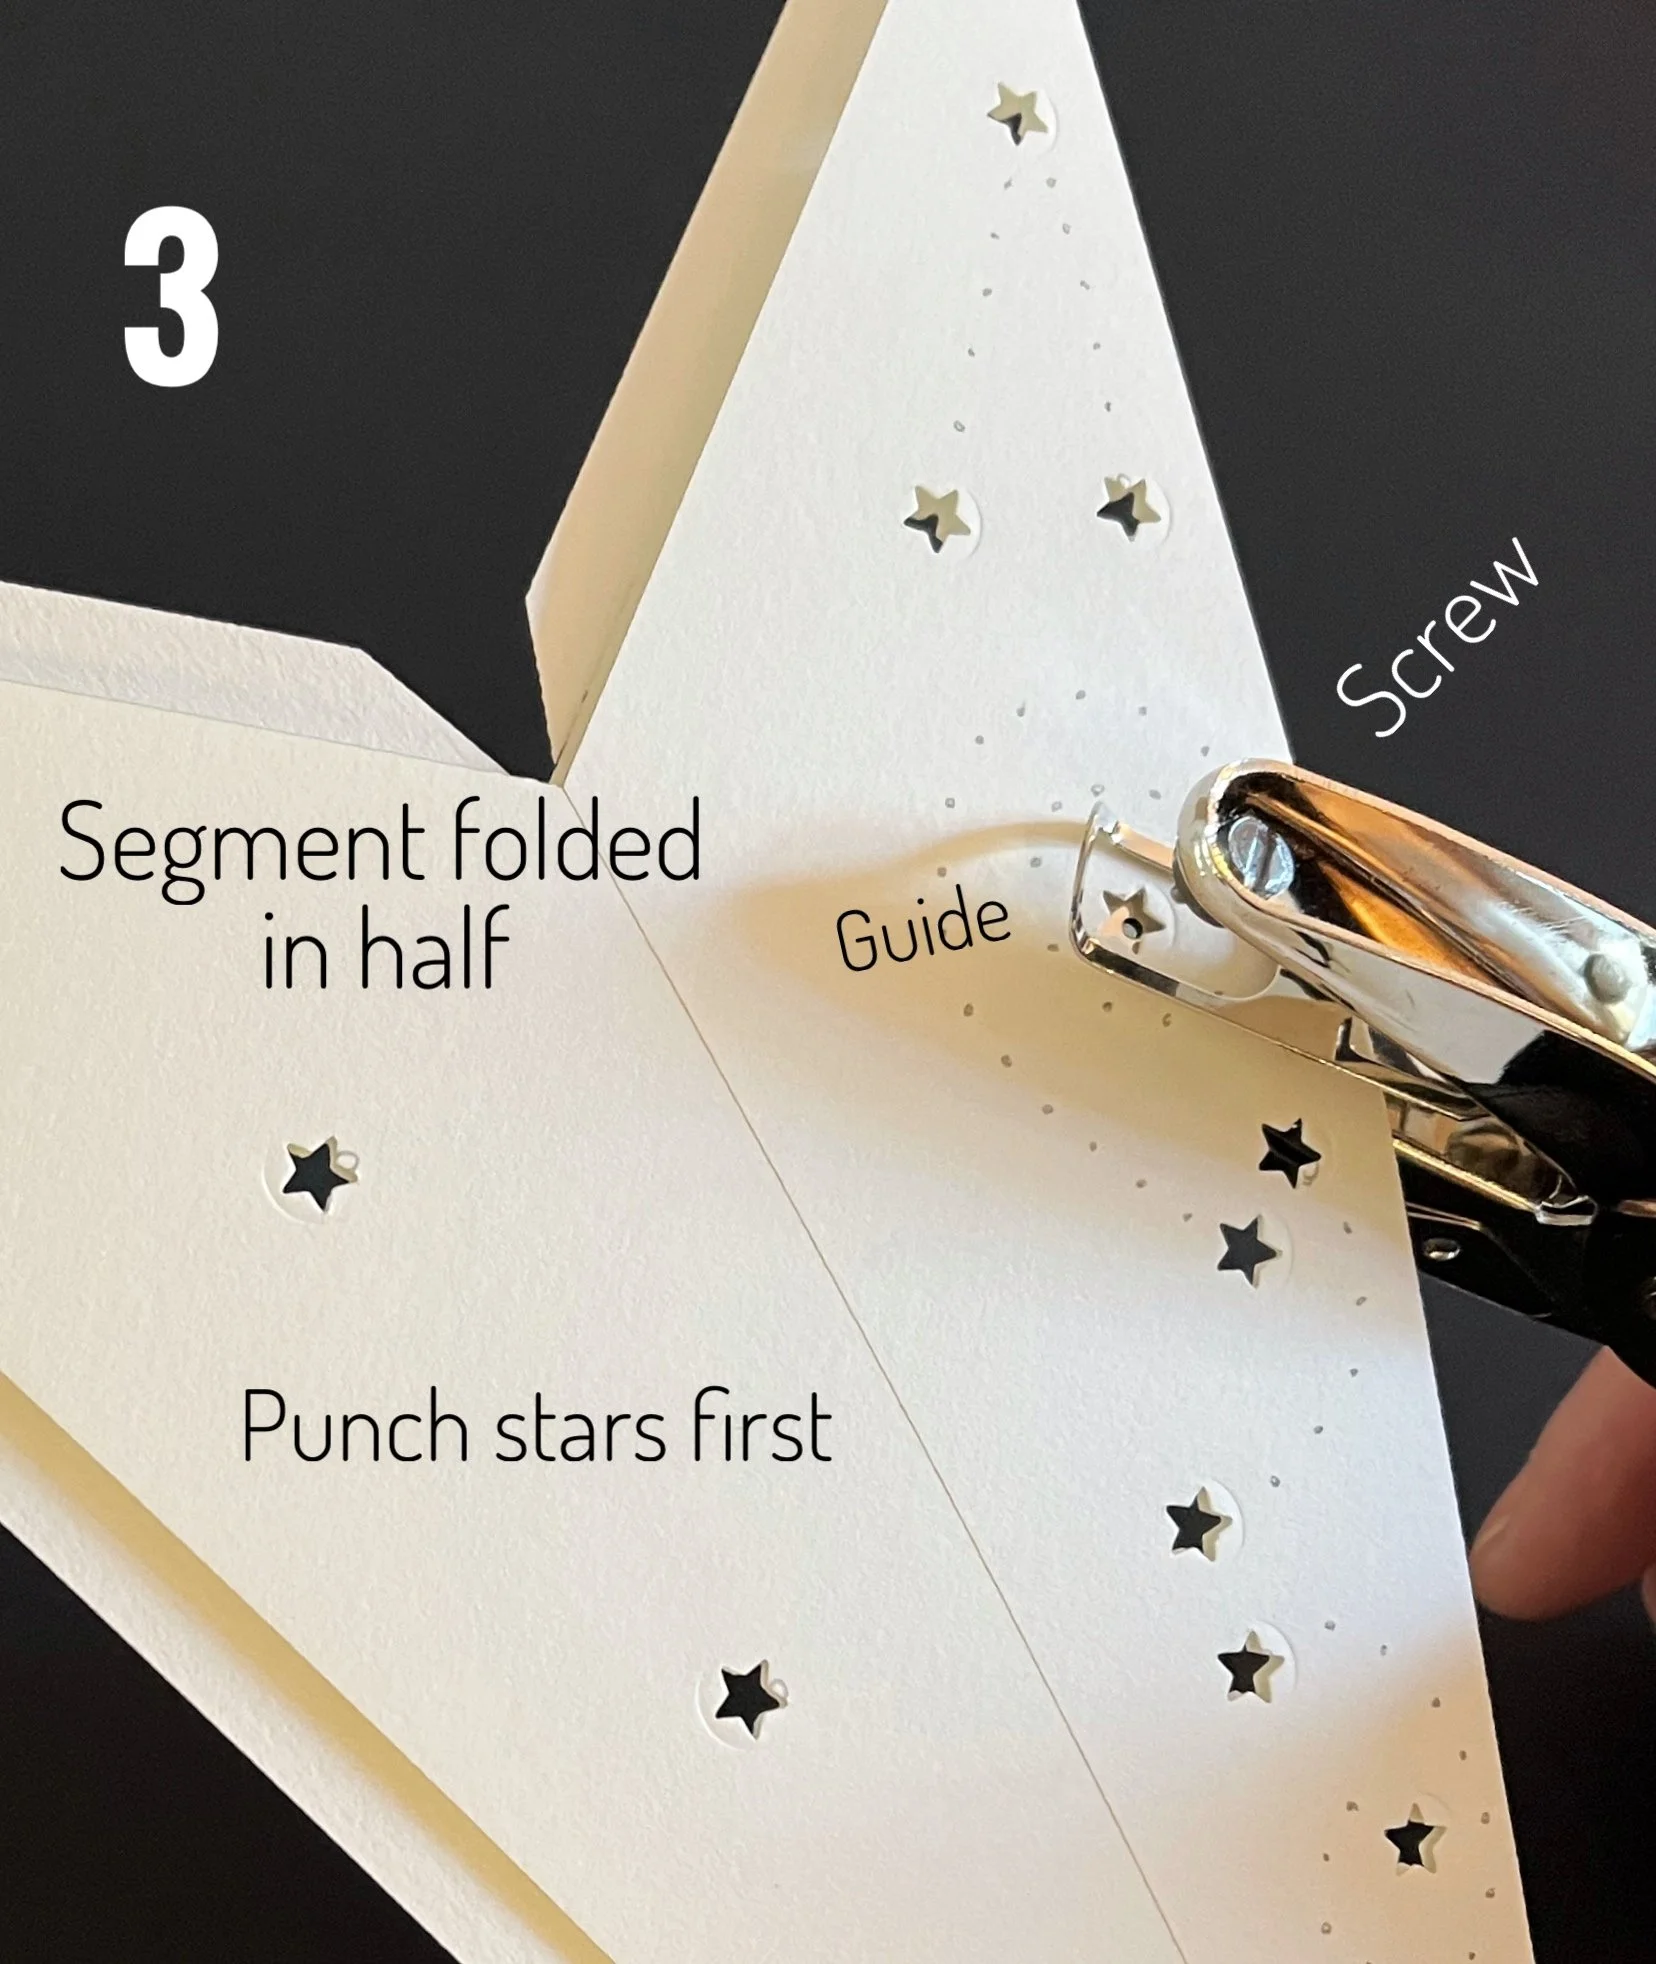
Now fold over your designed segment ready to punch the holes. Hold your punch with the small screw facing upwards. Make sure the paper is fitting beneath the sledge-shaped metal guide. You should try this out on a piece of scrap paper first to get used to using the punches. Use them like you would a pair of garden clippers. A short sharp motion works best. It’s easier if you start punching the star shaped holes first, then move onto the single hole punch to punch out the dots. Of course you don’t need to have stars at all, you could just punch tiny dots. It’s up to you.
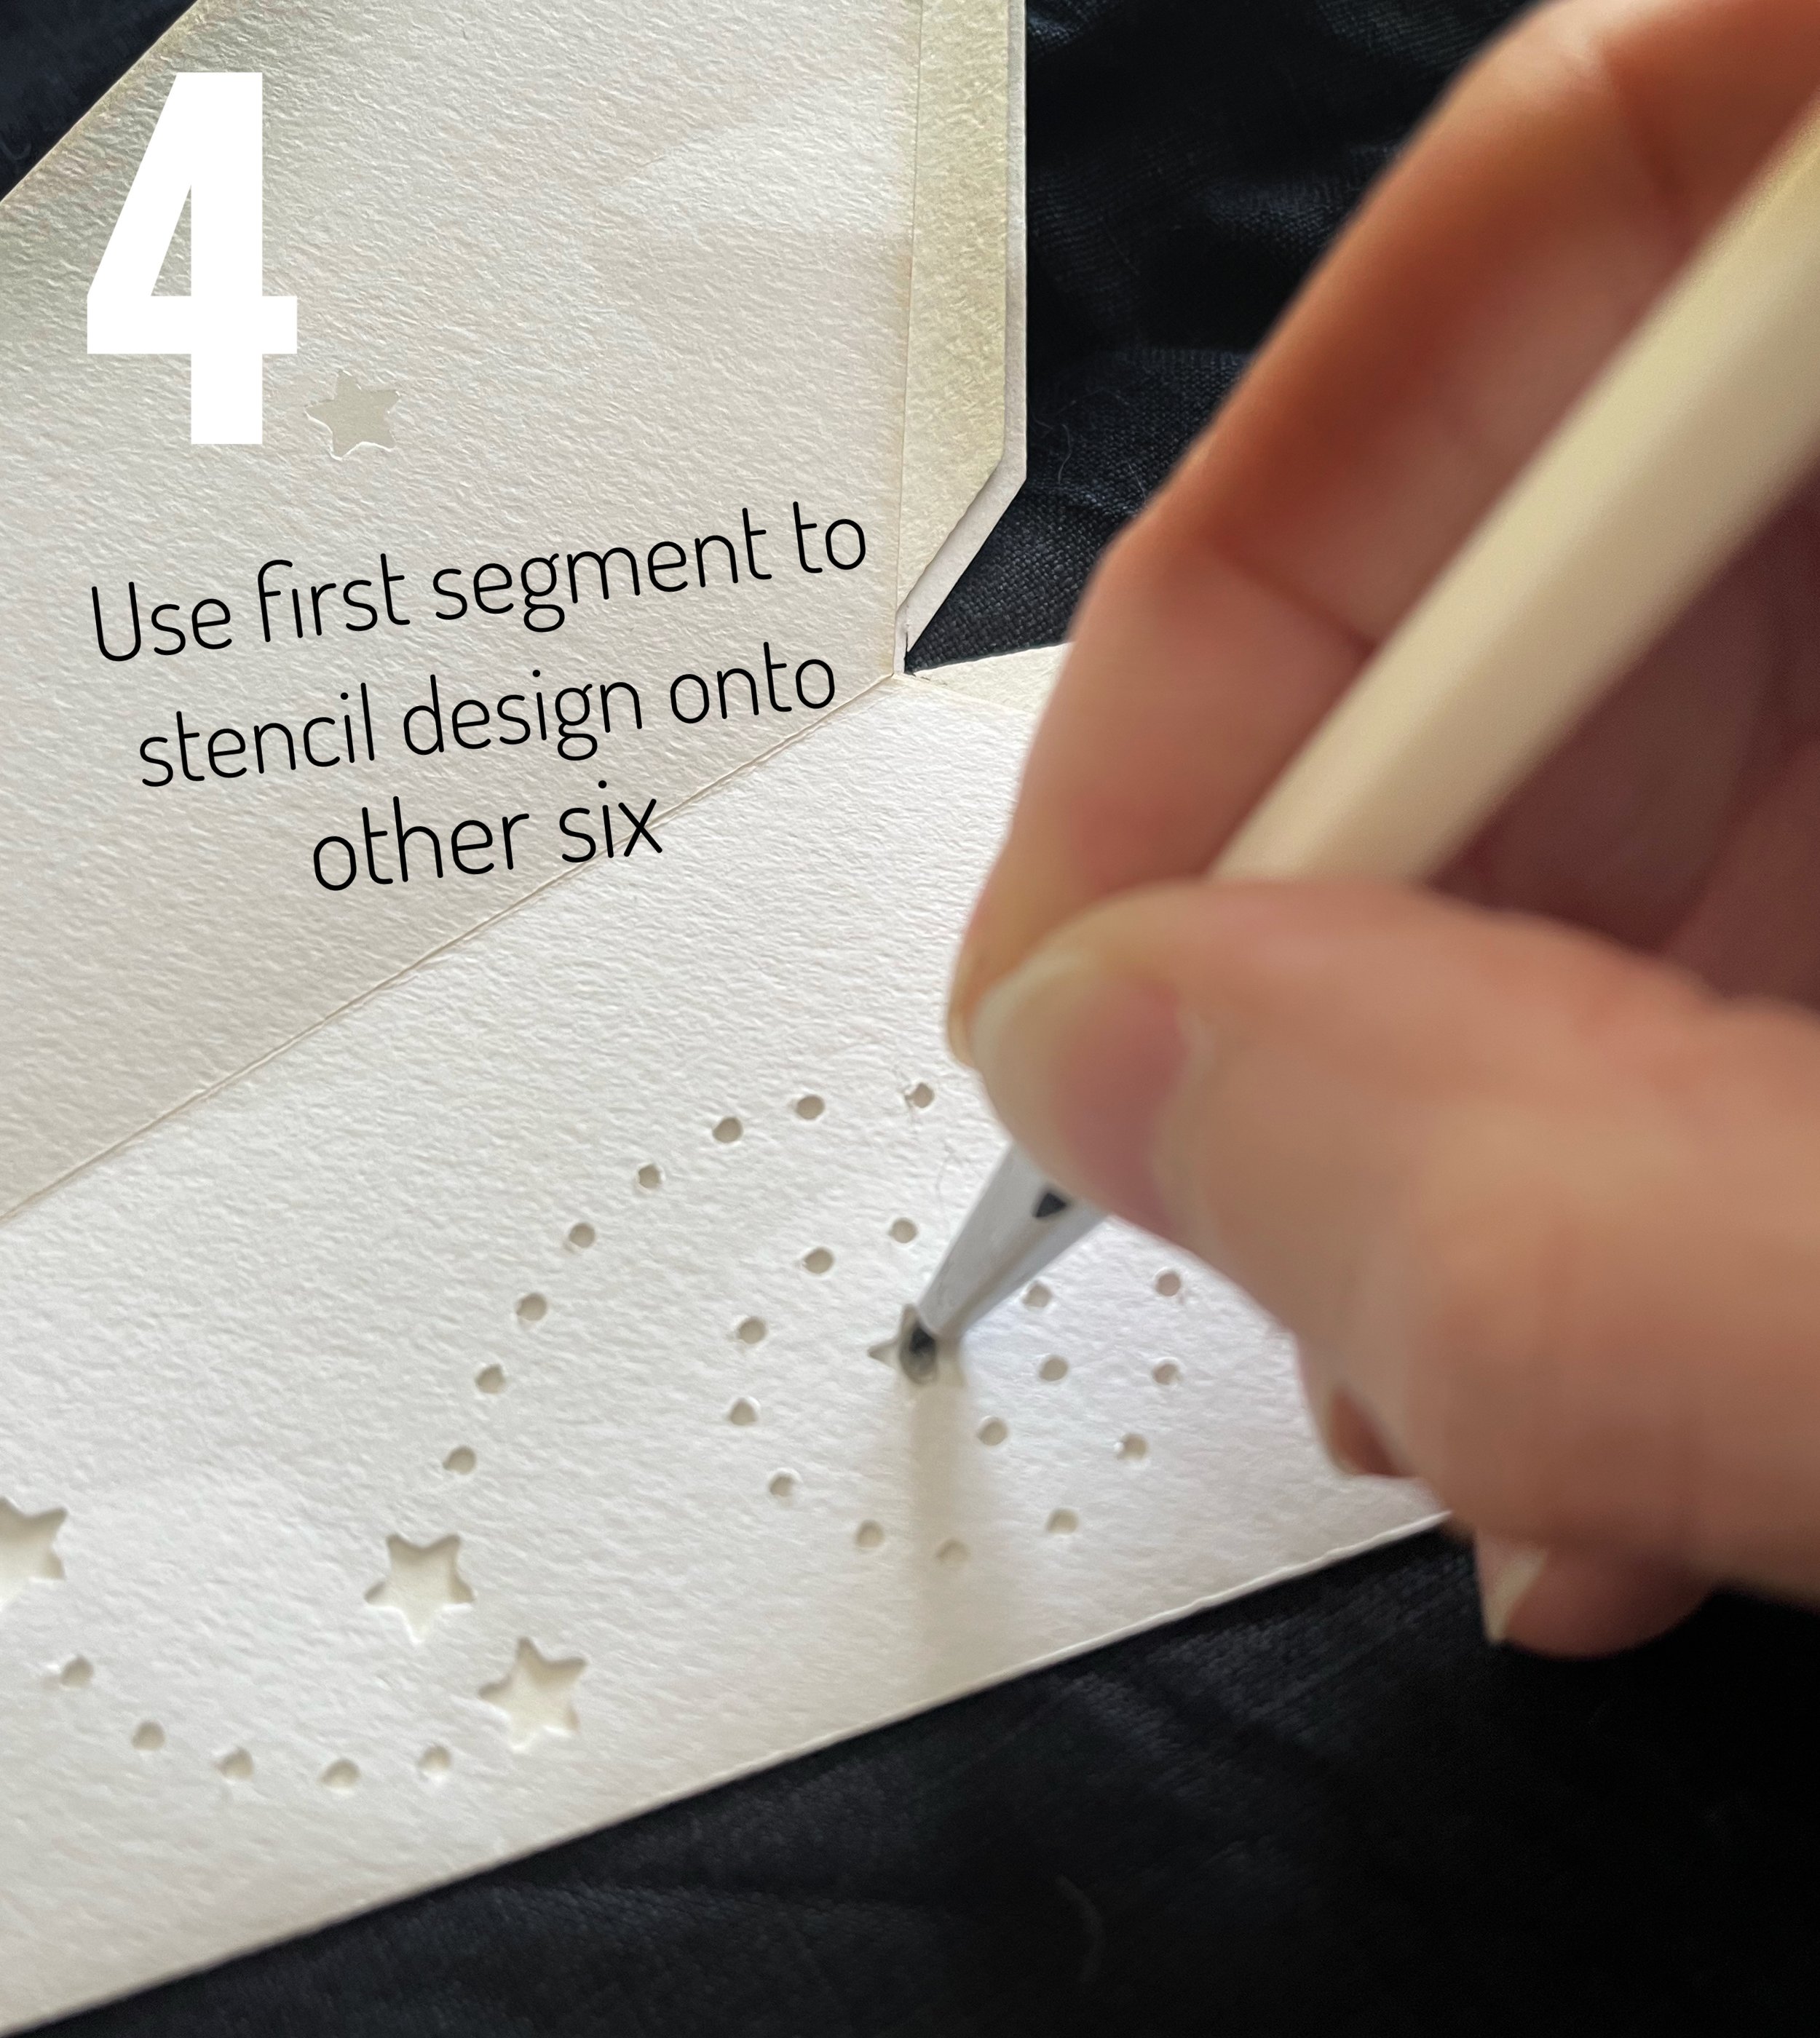
When you have completed punching the design out of the first spike segment, you can then use that segment as a stencil to copy the design onto the other six segments. Just slip the second spike segment, brown lines upwards, underneath the first one and make marks to denote which holes are stars and which are tiny dots.
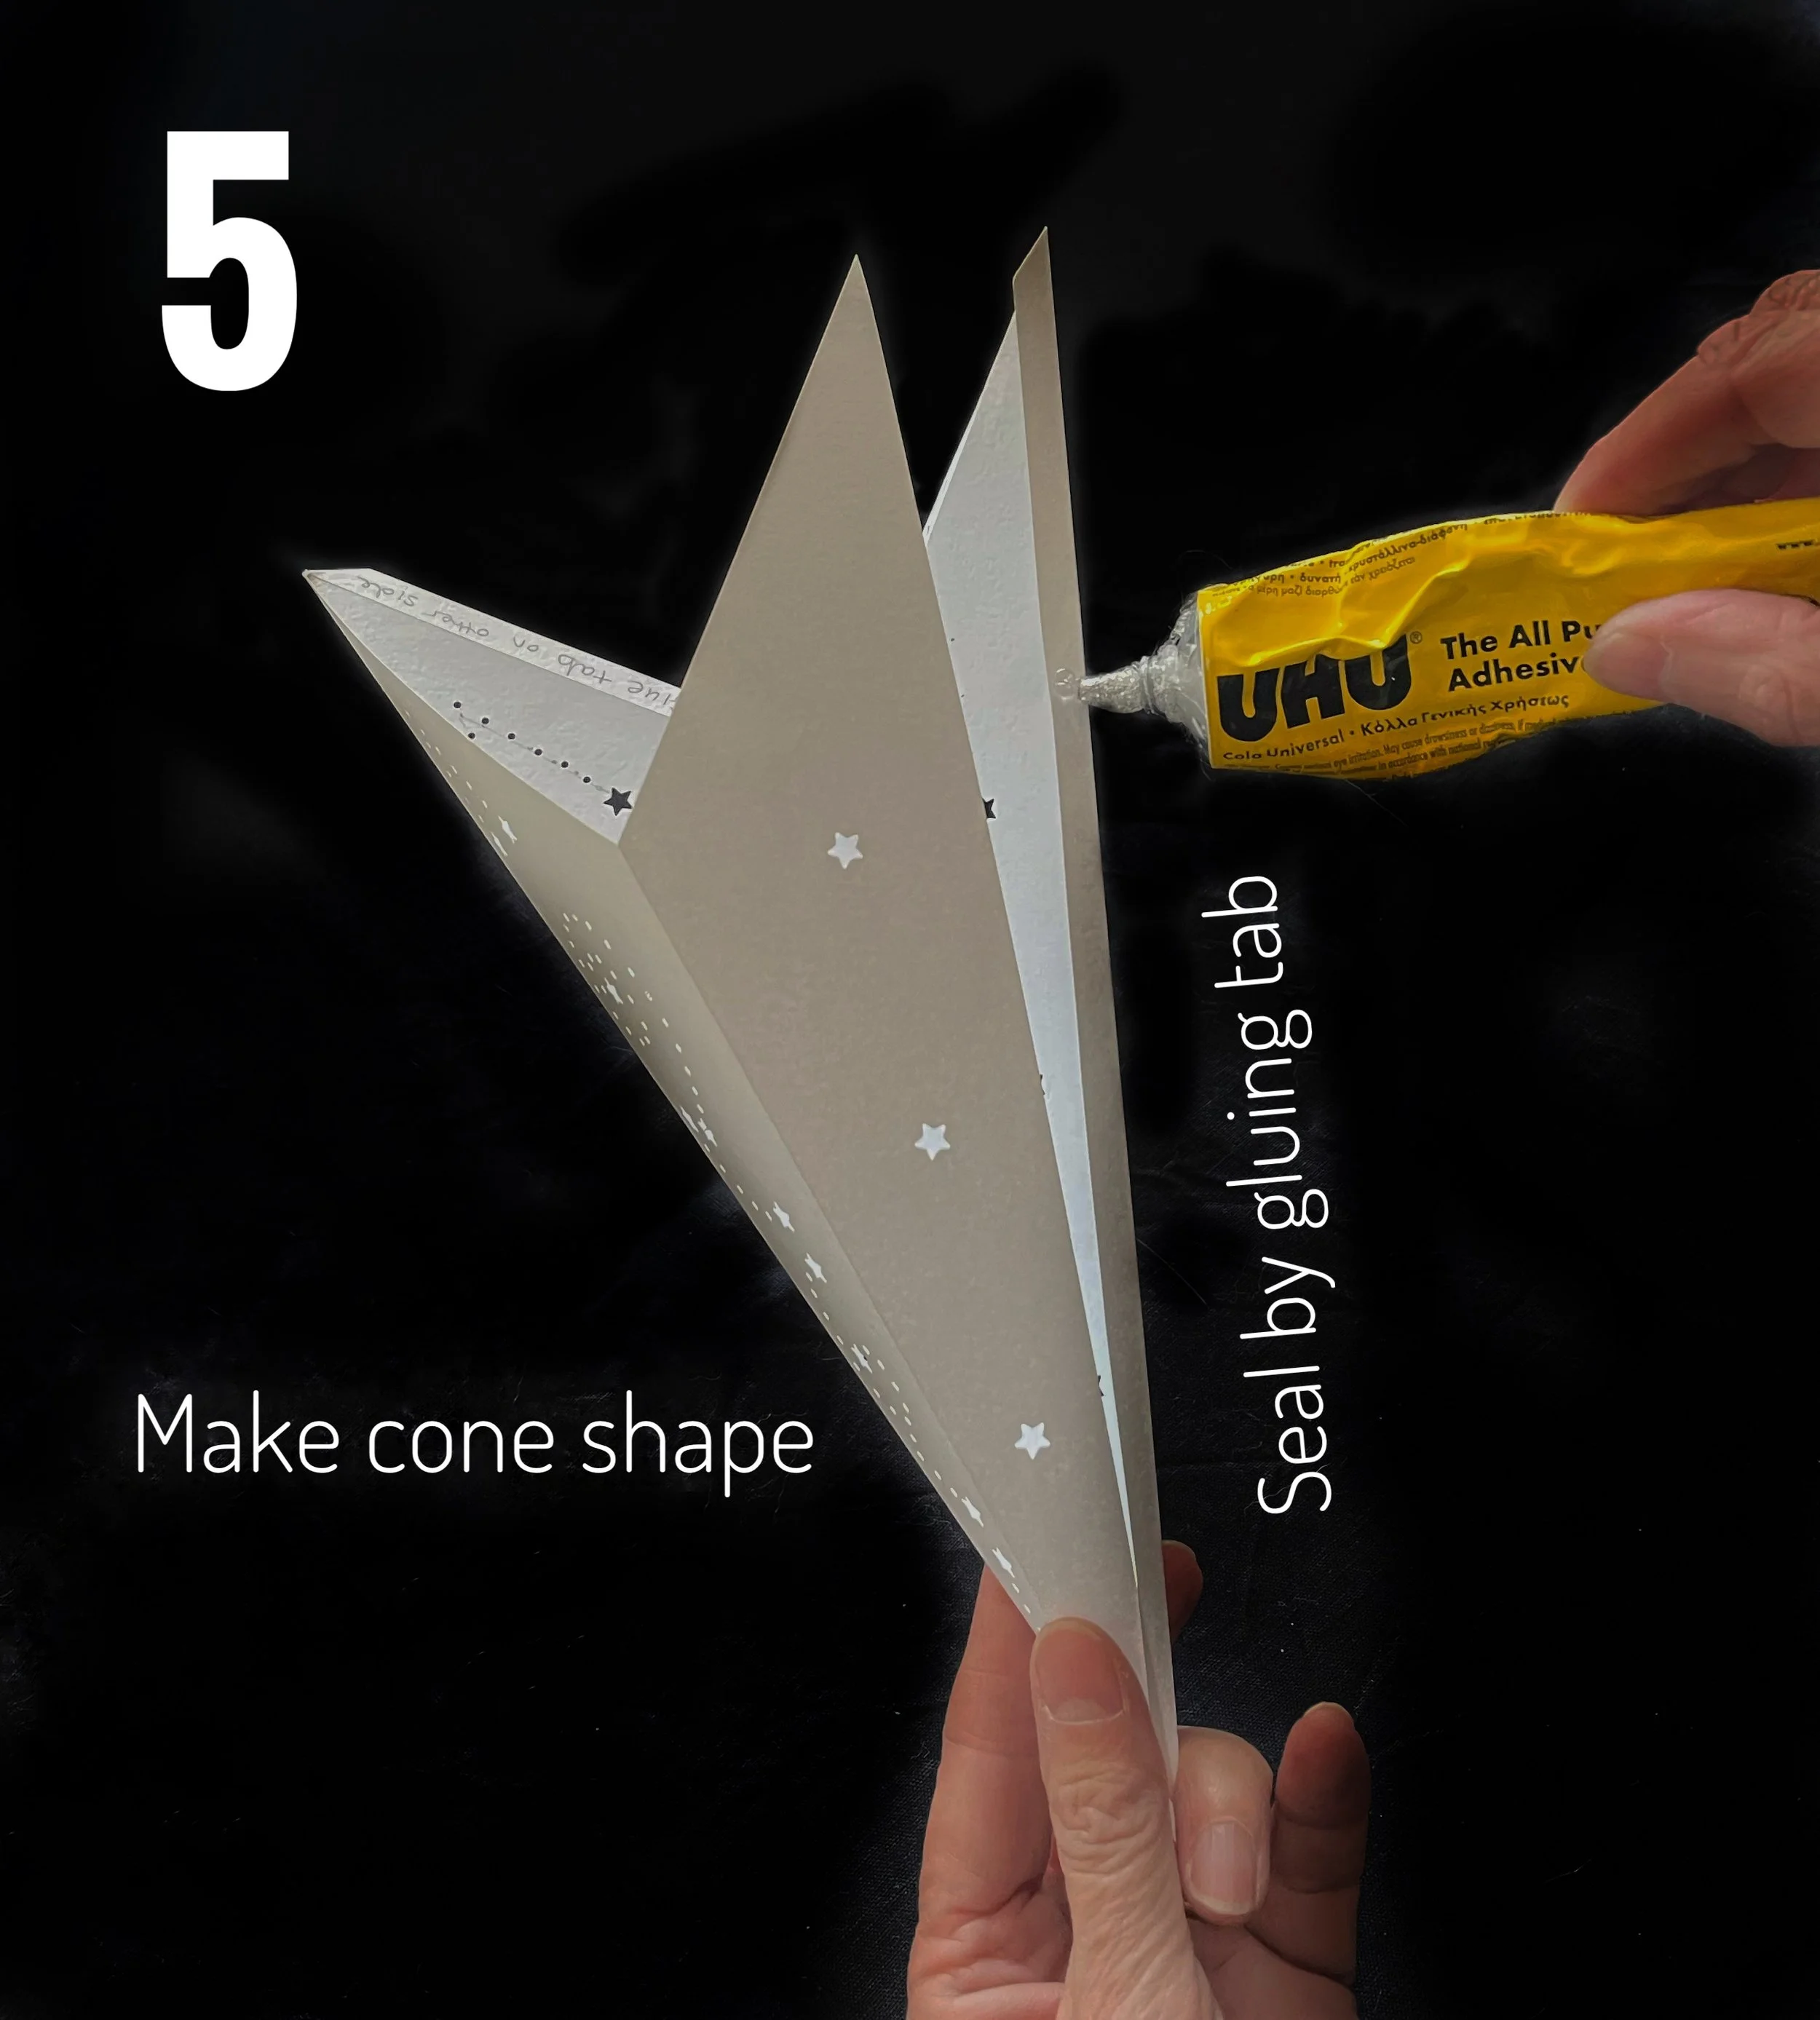
Now it’s time to start constructing your star. With each spike/segment fold all the LONG brown score lines inwards to create an angular cone. It’s really important that those brown score lines and your pencil marks are now on the INSIDE of each spike. Make sure that you get this right with each spike as it will be impossible to construct your star if any one of your spikes has been glued the wrong way round. Once you are sure you’ve got them the right way round, use the glueable long tab to seal the seam of your spikes.
You can use a chopstick to get inside your cone and really press down on that glued tab to create a nice neat, well-stuck seam.
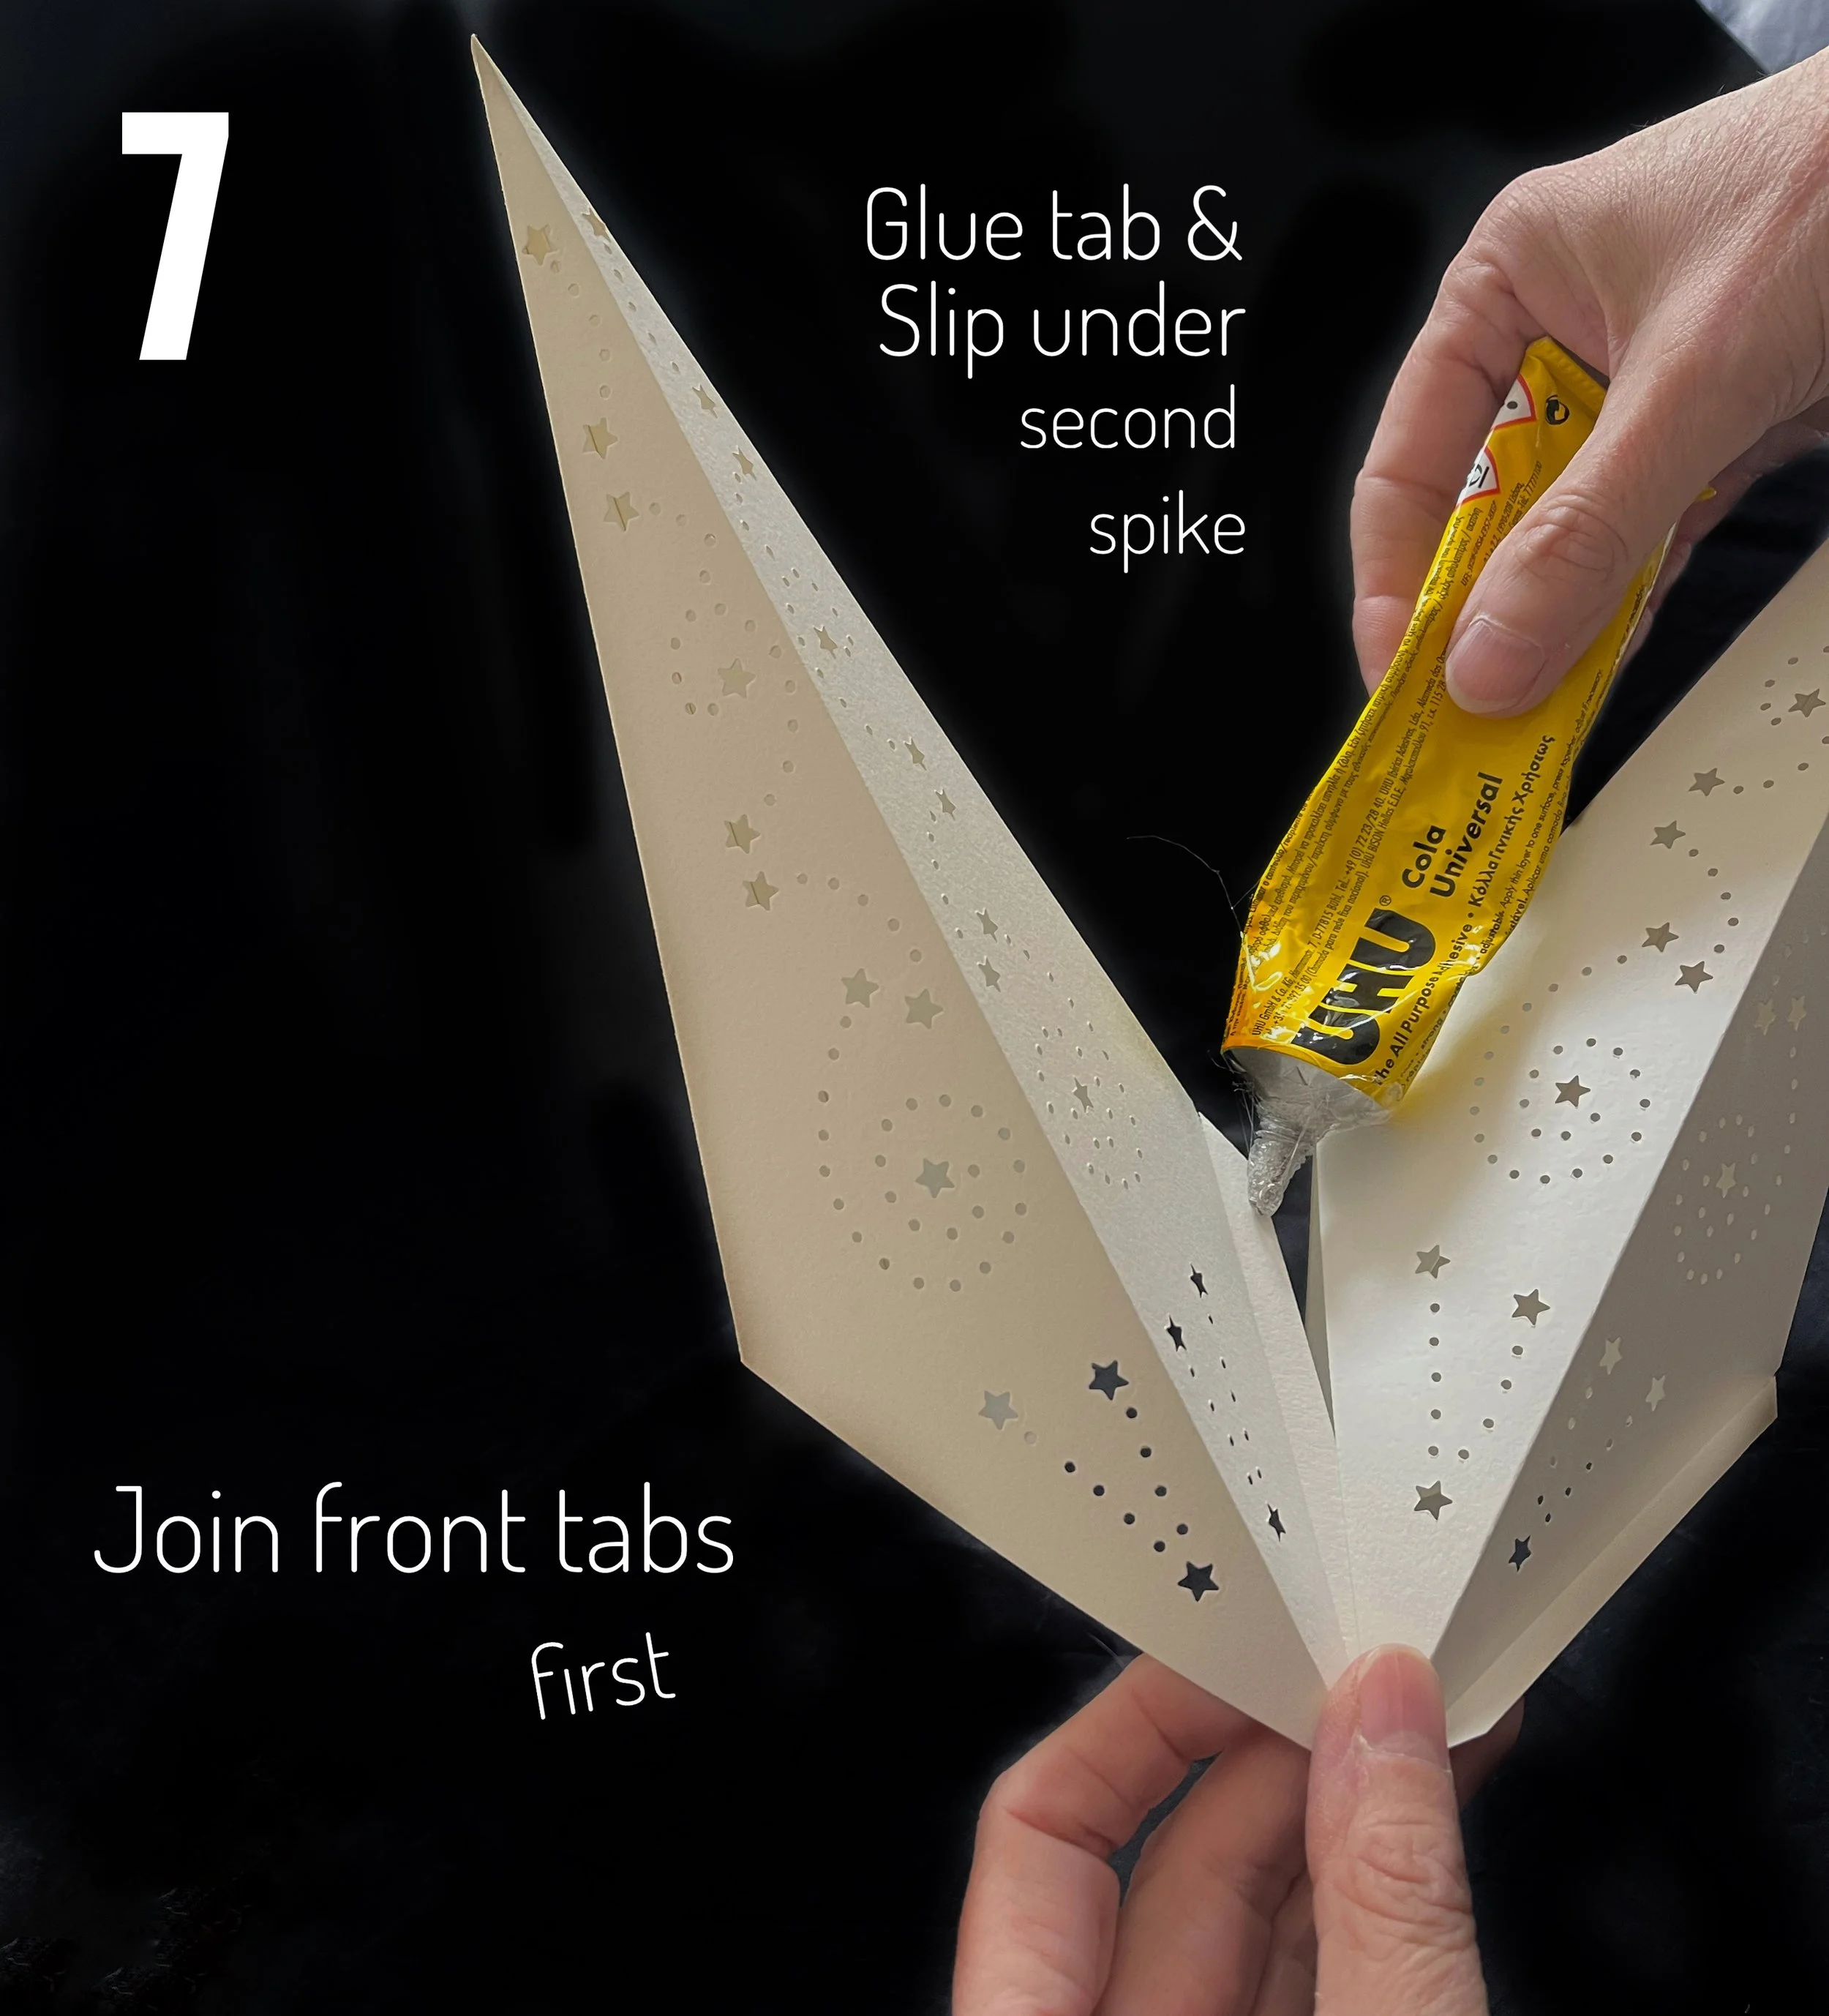
When all seven spikes are made, gently but firmly flatten each one, paying particular attention to the points at each end. Now take the two SHORT glue tabs and fold them OUTWARDS. These are going to help you connect one spike to the next one. Hold one spike upwards with the design at the front. Apply glue to the top side of the small tab and bring your second spike in to sit on top of the glued tab. Hold it in place for at least 10 seconds then gently set aside for the glue to dry thoroughly. You can then do the same with the rear tab. Now you’ll have a pair of conjoined spikes. Gently crush these flat. Then make two more pairs of conjoined spikes. You’ll have one spare spike left. Remember to FLATTEN all the pairs. They need to learn to be collapsed flat for storage.
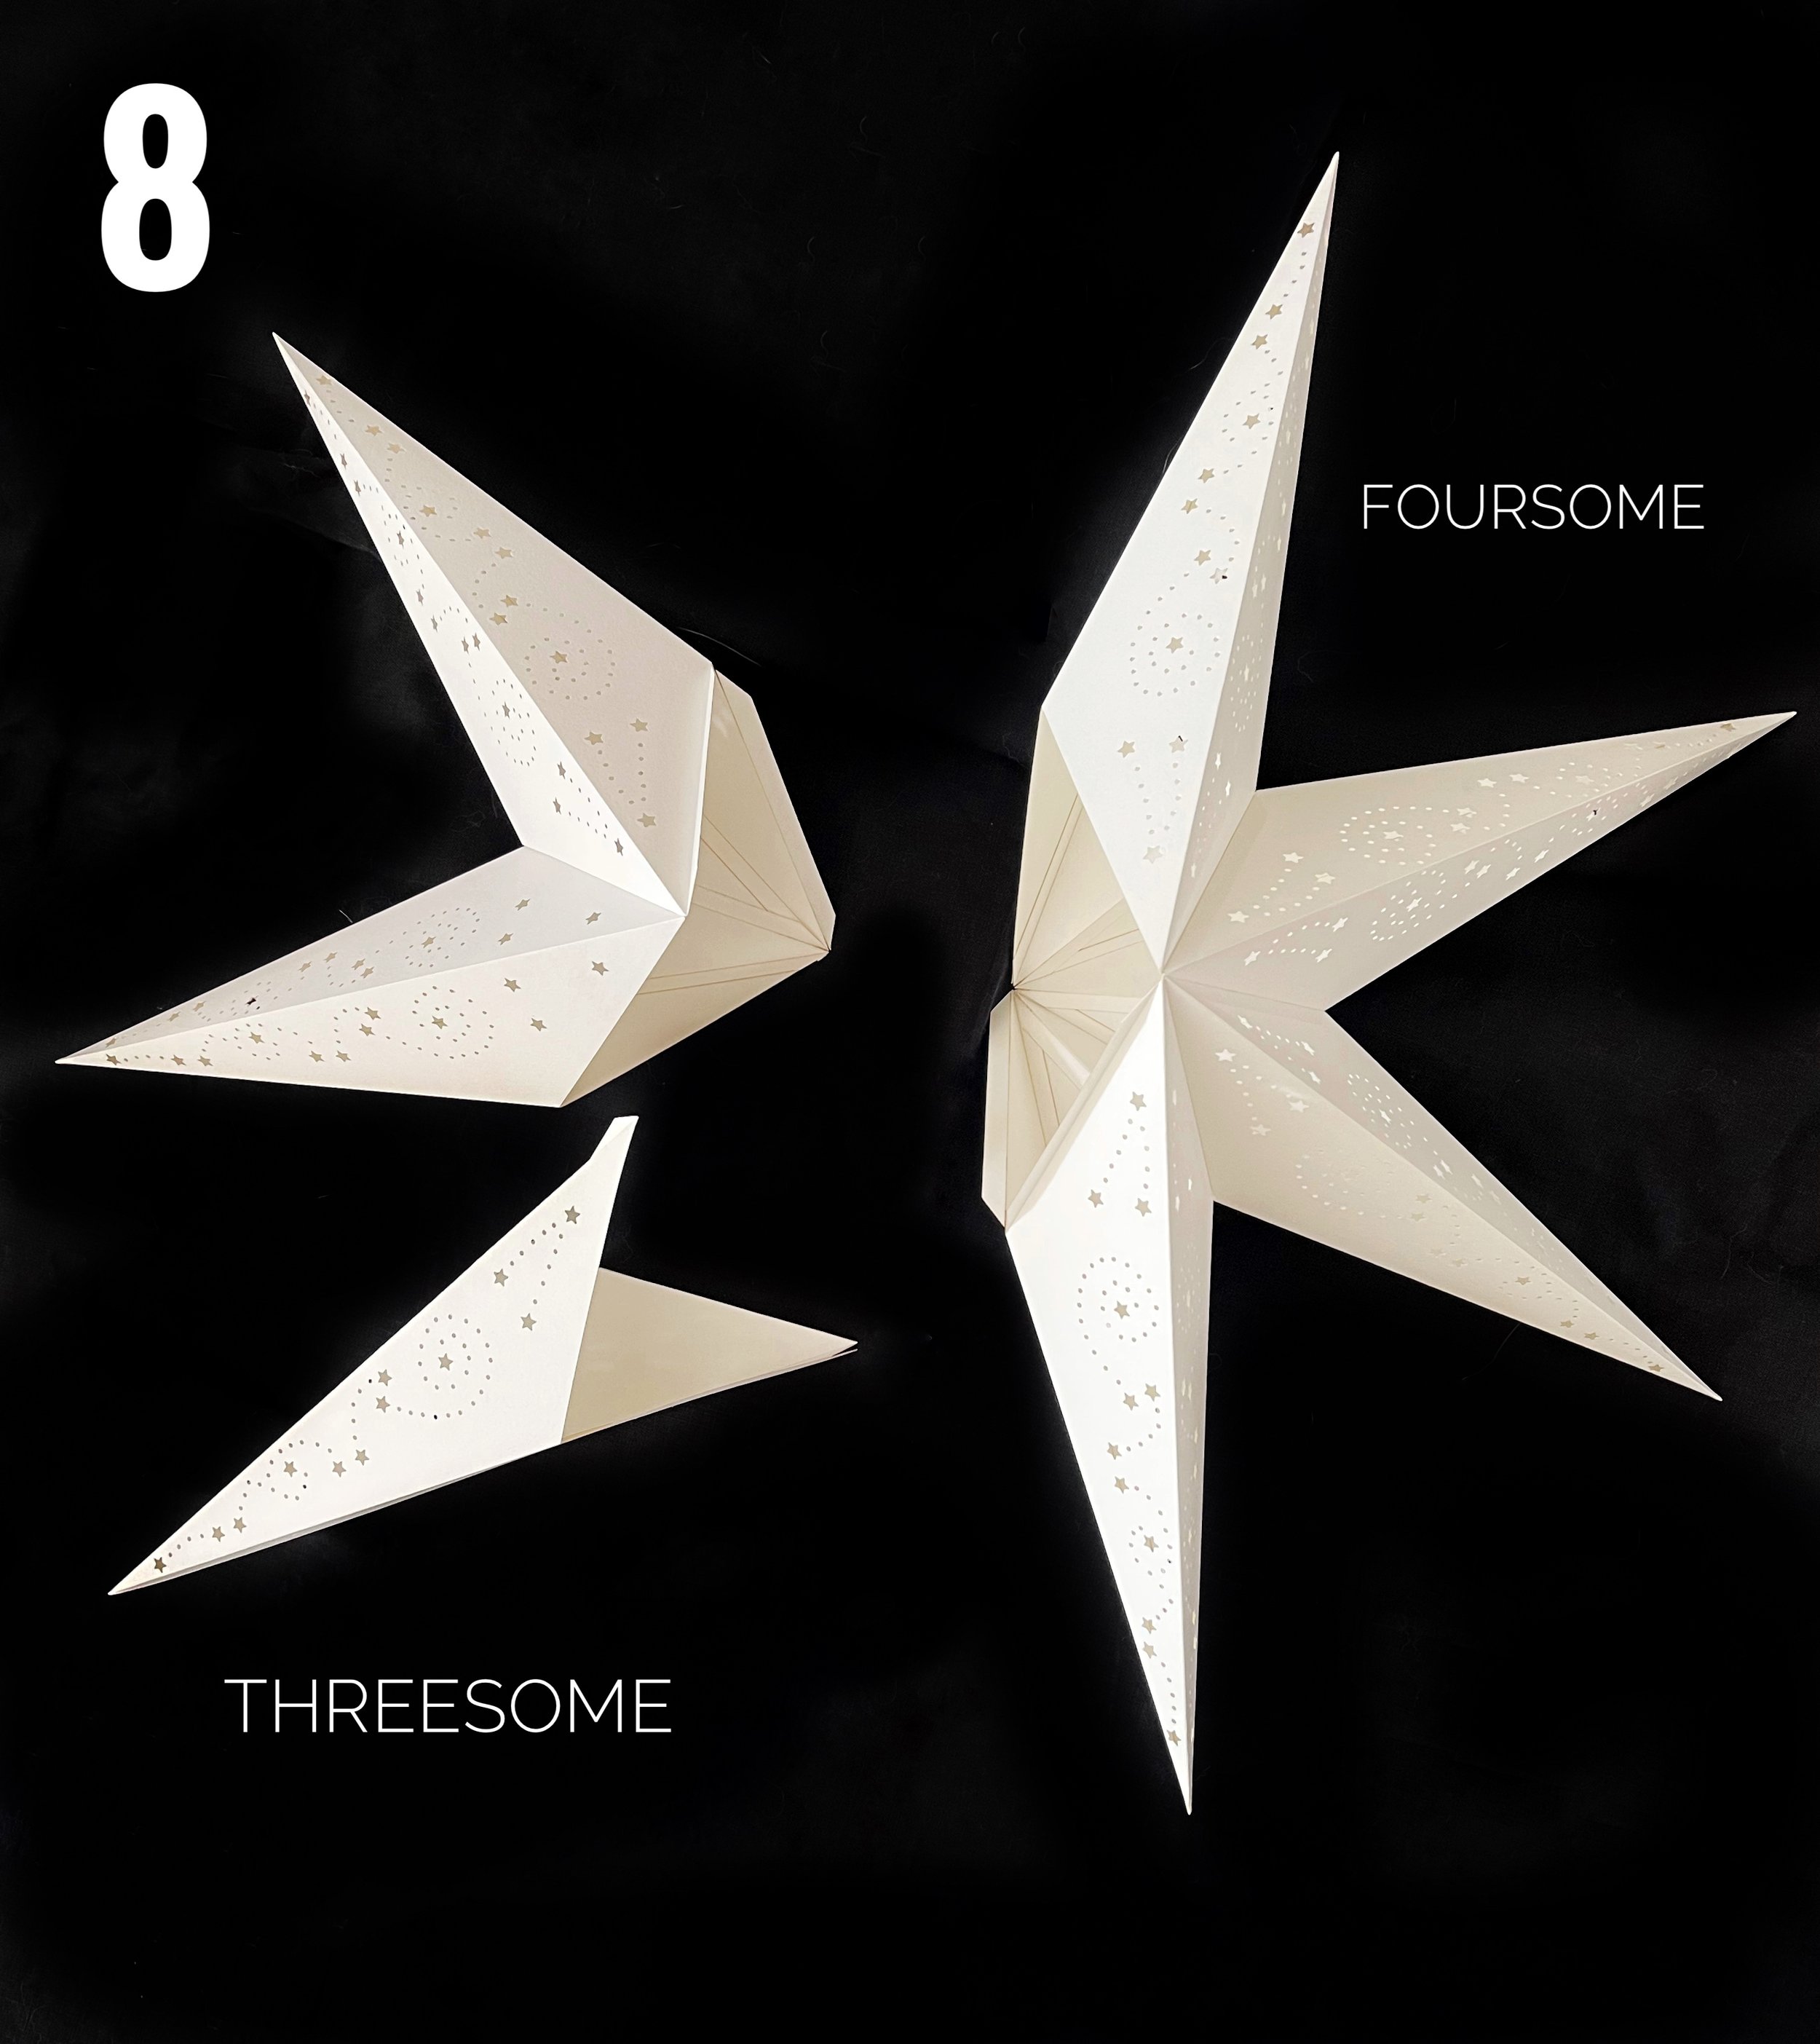
Follow the same sticking and flattening procedures to join two pairs together forming a foursome then form a threesome from the remaining pair and the solitary spike. Again, remember to flatten them.
The final stage is to join your foursome to your threesome. This can be a bit awkward. You need to get your hand inside the small aperture that has been created. Don’t rush this. If you feel you’ve not got a good seal between the foursome and threesome, then you can always use a bit of Sellotape to hold things in place. Now gently crush the whole star flat.
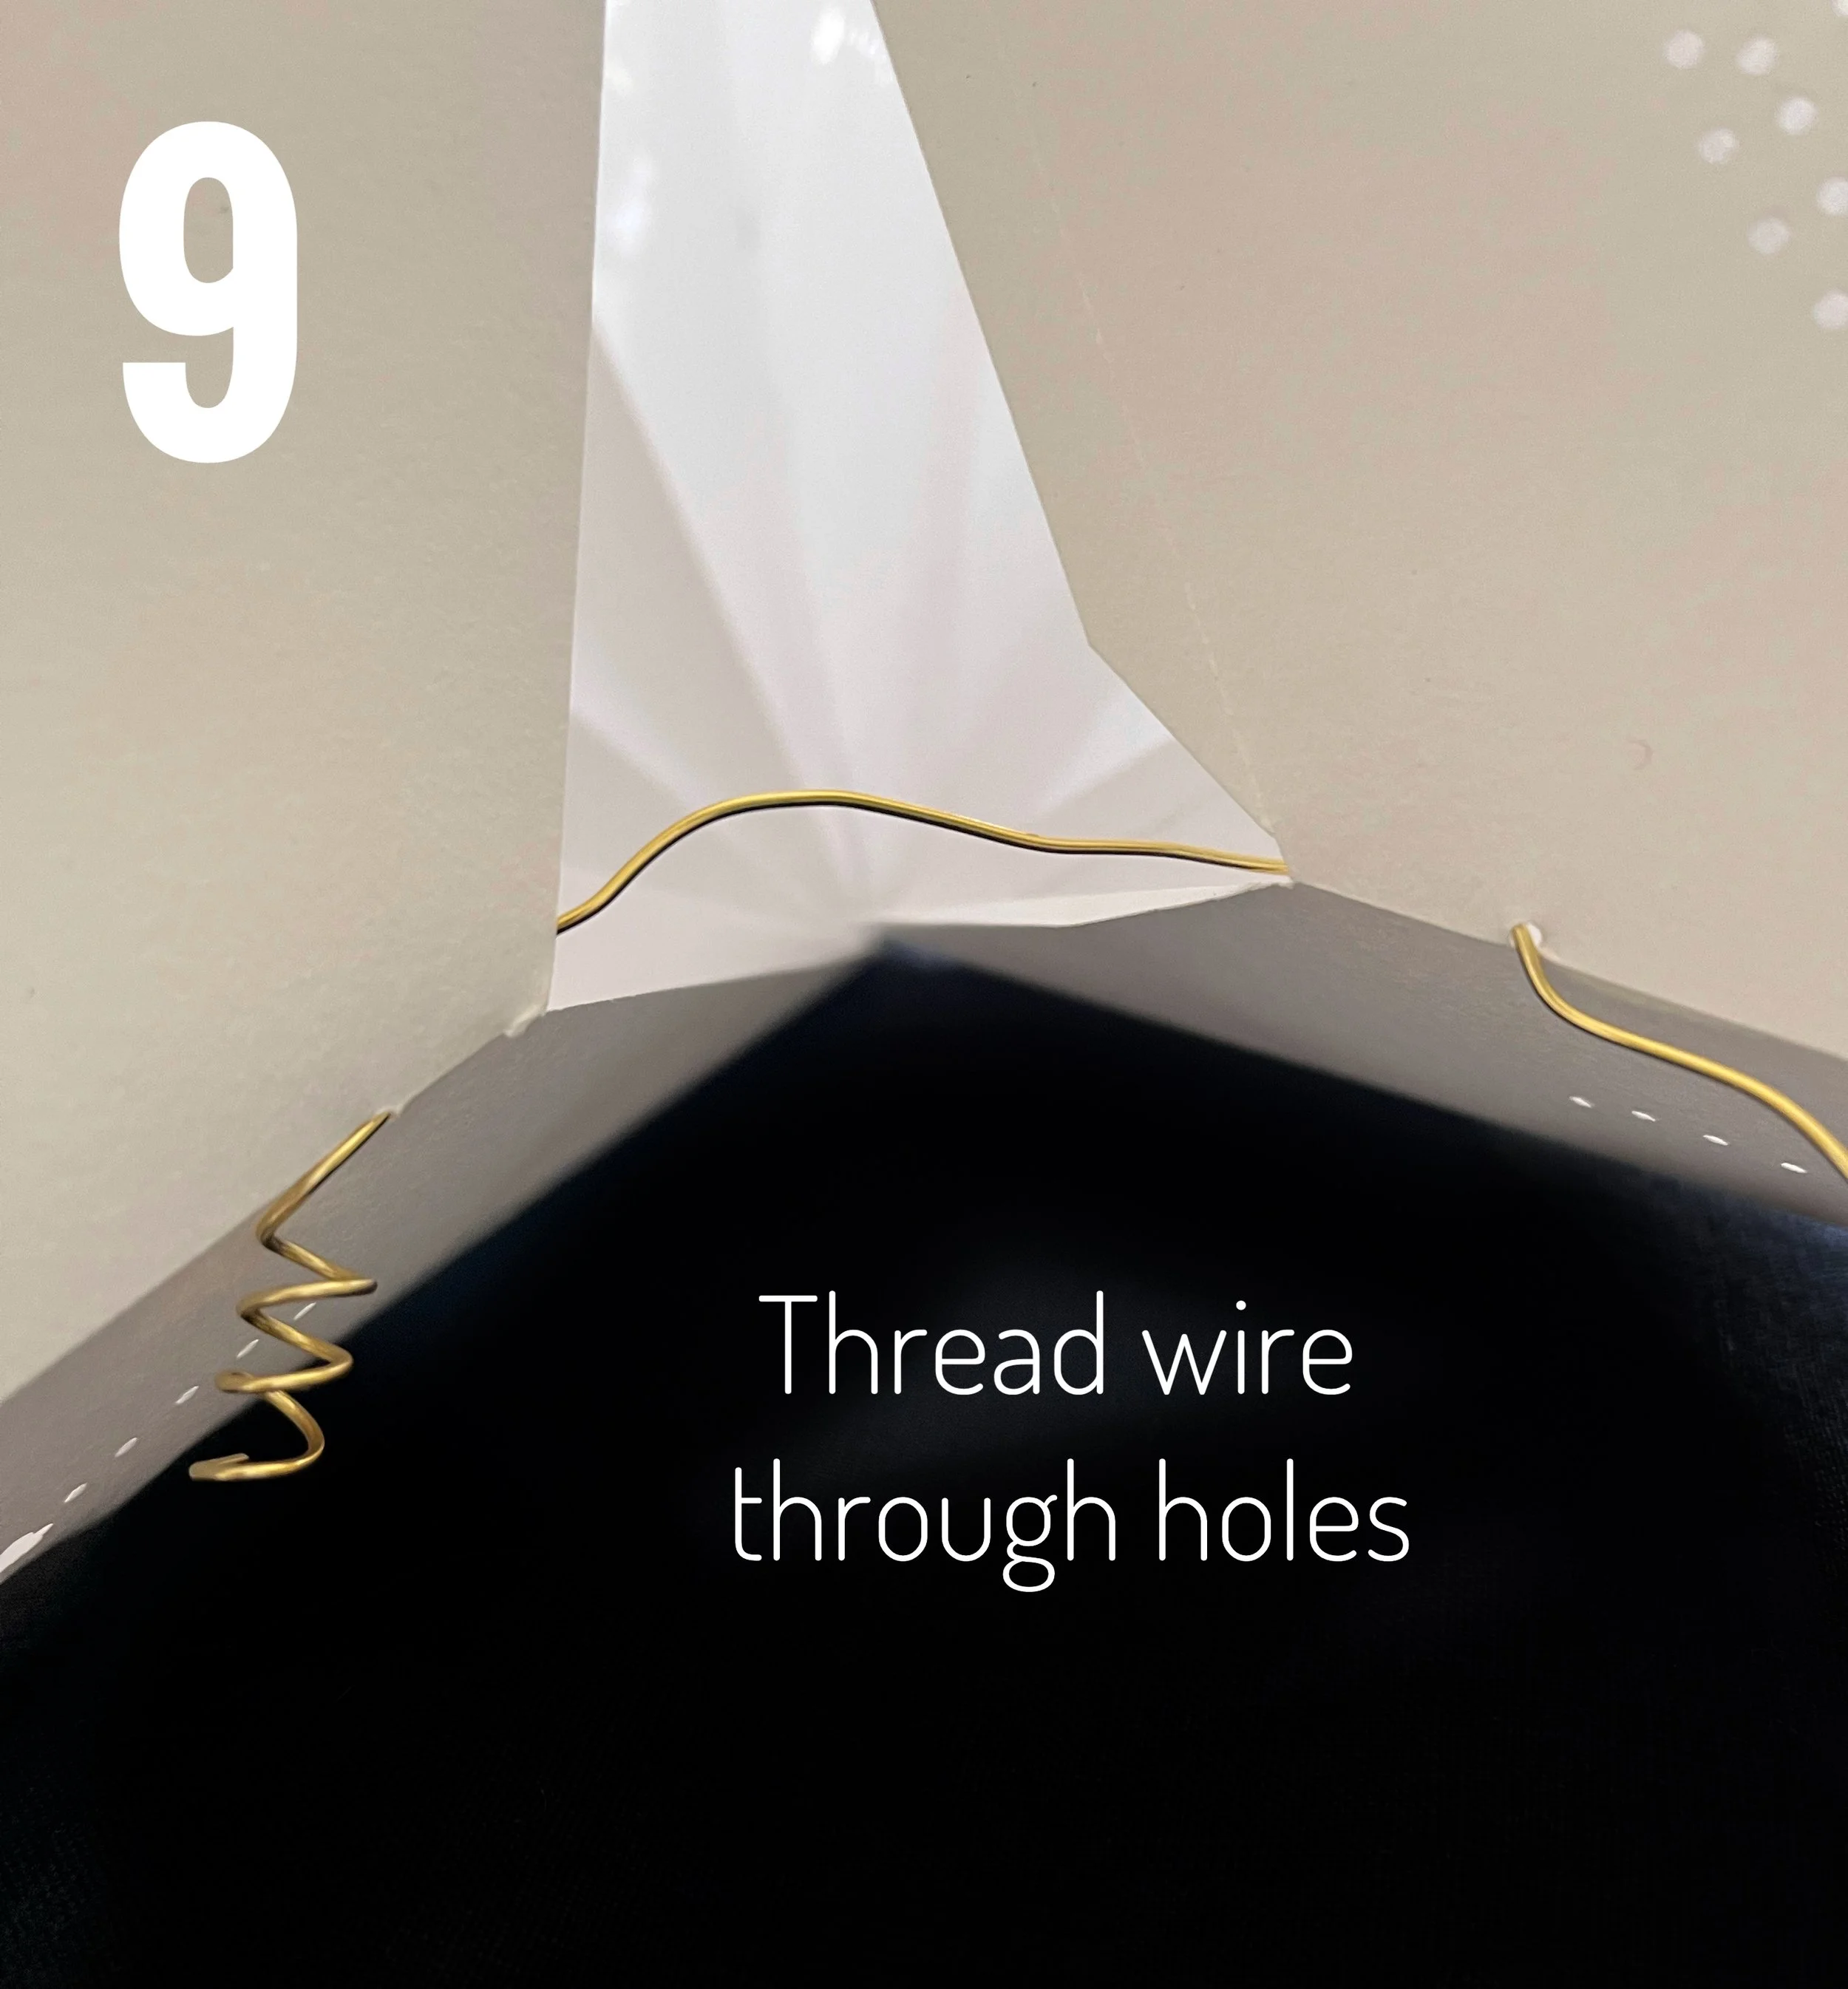
Do NOT stick down the final 2 tabs: You need have an aperture in order to insert your lighting option. Take your small hole punch and punch a tiny hole on either side of the aperture, you could strengthen this hole to prevent it ripping by using a small piece of sellotape on the inside of the aperture. This hole is for the fastening wire to go through. Thread the wire from the outside through the first hole across the aperture and out to the far side and then make a coil by wrapping the wire around the chopstick (this is so it won’t pop back out of the hole again). Open and close the star a few times to get it used to being collapsed flat for storage.
If the central join in the middle of your star looks a little bit ragged you can trim it by just 1 mm or so using a really sharp pair of scissors. This can make a real difference to the final result. Don’t trim it too much otherwise there will be a hole in the middle of your star.
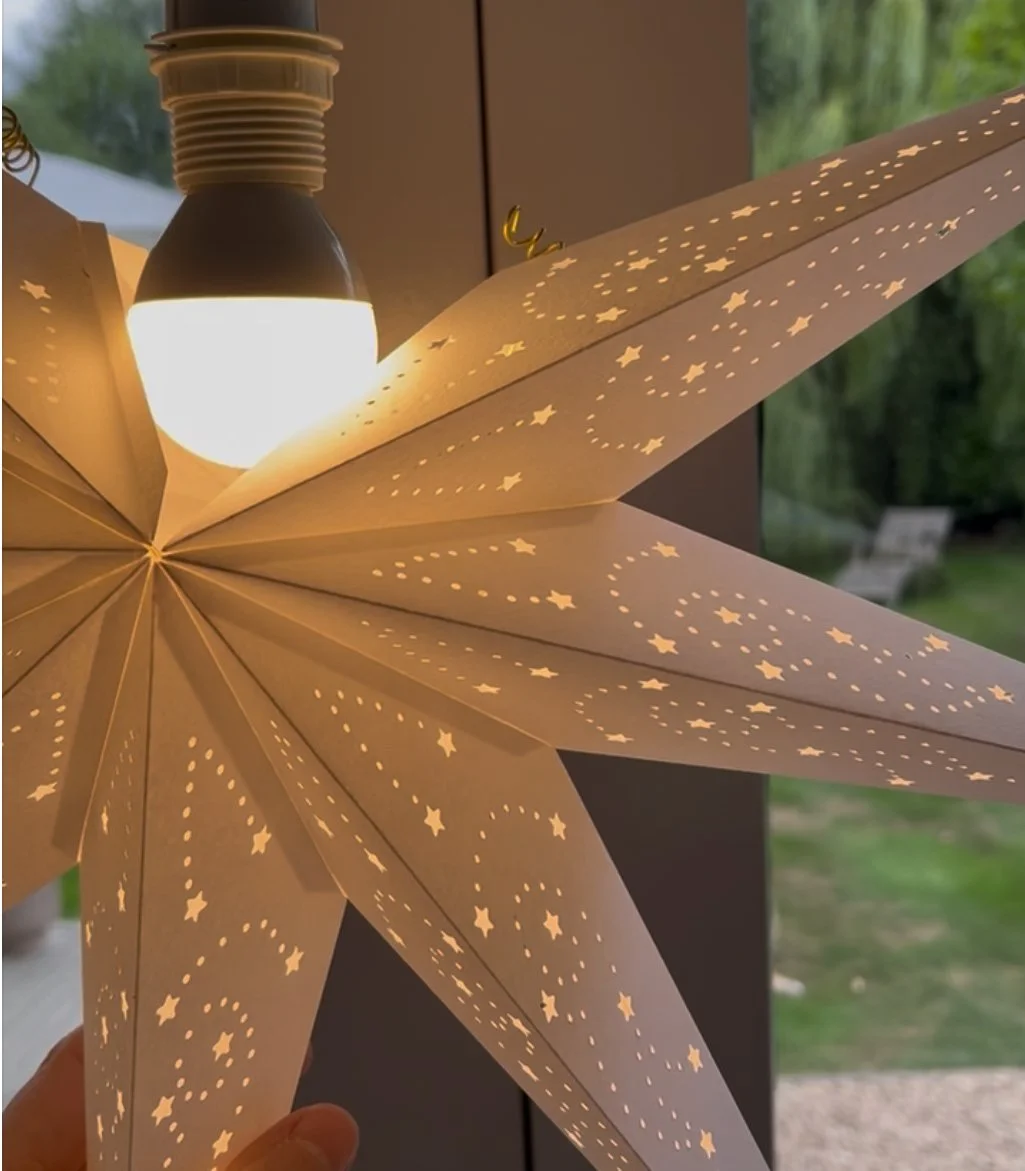
Now you can insert your lighting choice. You could use an electric LED lightbulb on a long cable, like the Scandinavians do, and hang your star from a window. The Strala 4m light cable is £7 plus you’ll need to buy a bulb to go with it (you can find similar on the Internet if IKEA has run out of stock). The other option is to use a string of 50 battery fairy lights. Stuff the lights into the belly of your star, but keep the battery pack and the lightless section of the cable outside for easy access. You might want to disguise the ugly battery box in a small drawstring bag or envelope. Now you’re ready to display your beautiful style paper star light in a window or on a mantelpiece or shelf.
There are videos on my Instagram account in the highlights section and elsewhere showing elements of the star-making process